

Clay bar your car: when the paint needs it before winter
The paint is freshly washed and shiny, but run your hand over the bonnet and it feels like fine sandpaper. On the boot lid there are tiny orange dots that no wash will shift. Right now, just before winter, it's worth asking: does the paint need a clay bar treatment before the sealant goes on for the cold months? Rain is moving in this afternoon, and it stays changeable until the weekend. From Monday the forecast shows clear, dry days. That's your window for this step.
Clay barring your car before winter pays off whenever the washed paint feels rough. That means iron fallout, industrial fallout, tree sap or tar are stuck fast to the surface. If you don't remove them before sealing, you lock them in under the protection, and the road salt adds to it over winter.
Iron fallout, industrial fallout and tree sap make paint rough in autumn
Over summer and autumn, paint doesn't just get dirty. It also collects contamination that bonds firmly to the surface and won't come off with shampoo and a sponge.
The biggest group is fine metal particles. They come from brake dust, railway lines, industry and building sites where people are using angle grinders. These particles land on the paint as industrial fallout, embed themselves in the clear coat surface and start to oxidise. Then you see them as small orange or brown specks, especially on light-coloured paint, on the tailgate and along the sides behind the wheels. That's iron fallout. On dark paint like black you can hardly see it, but you can feel it.
On top of that you get tree sap from maples and limes, tar spatter from freshly patched roads, baked-on bug residue from late summer and overspray when someone has been painting nearby. Each of these deposits sticks up a tiny bit from the surface. That's exactly why the paint feels rough even though it looks clean.
Autumn makes the problem worse. There's dew on the car in the morning, humidity was above 90 per cent early today, and damp air speeds up the oxidation of the iron particles. What sat on the paint as a grey speck in July is often a rust spot by October. From November the road salt goes down, and salt combined with moisture makes those spots keep growing.
Important for your expectations: a clay bar removes things that sit on the paint. It doesn't remove scratches, swirls from the car wash or water spots that have already etched into the clear coat. All of that is in the paint, not on it. For that you need a polish.
Sealing over iron fallout locks it in for the winter
Lots of people seal their car in autumn so it gets through the salt and slush well protected. That's the right call, but only on a surface that's genuinely clean.
A sealant lays down a thin layer over everything sitting on the paint. If there are still metal particles, sap or tar residue there, you seal them in too. The protection bonds less well at those spots, the surface stays rough, and dirt grabs onto the small bumps straight away. Washing in winter gets harder, and the iron fallout keeps working away under the layer.
That's why there's a fixed order, which Koch-Chemie also sets out in the data sheet for its clay bar: first a thorough wash and chemical decontamination, then clay, then polish if needed, and finally seal. So the clay sits between the wash and the polish. It preps the paint for everything that comes after.
That leads to a second truth that often gets forgotten. Claying strips off most of any existing wax or sealant layer. So if you clay, you have to seal again afterwards. Claying without protection afterwards leaves the paint more exposed than before, especially going into winter.
An intact ceramic coating is a different story. As long as it beads well and the paint is smooth, the clay stays in the cupboard. Claying only makes sense there once the coating is due to be renewed anyway.
More on the chemical side in the article Flash Rust on Your Car: Dissolve It Chemically, Don't Sand It.
Clay bar your car in four steps: check, dissolve iron fallout, clay, seal
A simple test tells you whether your paint needs clay, and after that comes a routine you can easily get done on a dry autumn day.
Step 1, the touch test. Wash the car thoroughly and let it dry. Then put your hand inside a thin plastic food bag, the kind you get for fruit, and stroke it flat and without pressure over the bonnet, the roof and the tailgate. The plastic sharpens the feel in your fingertips. Every bump you feel is contamination on the paint. If the panel feels smooth as glass, you don't need clay. If it feels sandy, claying is the next step.
Step 2, dissolve iron fallout chemically. Before the clay touches the paint, an iron fallout remover takes out a large share of the iron particles. You spray it onto the clean, cool paint, give it dwell time and watch it run purple at the rust spots. That's the reaction with the iron. Then you rinse everything off thoroughly with water. Rinsing matters, because leftover iron fallout remover attacks the clay. The iron fallout remover won't shift tar spots; there are dedicated tar removers for that.
Step 3, clay. Take about a quarter of the bar and shape it in your hand into a flat disc, roughly palm-sized. Work in sections of about 50 by 50 centimetres. Spray each section generously with clay lube, lay the clay flat and glide it over the paint in straight lines with no pressure, or light pressure at most. First lengthways, then crossways, never in circles. At first you'll hear and feel a slight scratchy drag. When the clay glides silently, that section is done. Then wipe off the lube residue with a soft microfibre cloth and check the spot again with the bag.
Check the underside of the clay as you go. You'll see grey and brown specks there; that's the dirt it has picked up. When one side is full, fold the clay and knead the dirt inwards until a clean surface is on top again. Once the clay is completely loaded, use a fresh piece.

You can clay glass the same way. Matte paint and wrapped surfaces, on the other hand, you don't clay. There the clay would smooth out the texture and leave shiny patches.
Step 4, seal. After claying, the paint is bare and unprotected. If you can see swirls, now is the time to polish. Without polishing, you go straight to sealing. A rinse-off sealant is easiest to apply after a final wash: spray it onto the wet car, give it a moment to work, rinse off and dry. That way the paint goes into winter smooth and protected.
Four products for claying before winter
For the routine of touch test, iron fallout, clay and protection you need four things, and all four are chemically compatible.
The Koch-Chemie Reinigungsknete "Rkb" Mild "Blau" Clay Bar 200 g is the clay for normal autumn paint. It's mild, suits paint and glass and, according to Koch-Chemie, is used before polishing. It's soft to shape in your hand and glides over the panel with lube and no pressure. One customer wrote in his review how much residue was still on his paint after washing. After use, store the clay slightly damp in its tin so it doesn't dry out.
The Koch-Chemie Clay Spray "Cls" Clay Lube for Decon Clay 500 ml is the matching lube. It lays down a film between clay and paint so the clay glides instead of rubbing. Better too much than too little. As soon as the clay snags or squeaks anywhere, you need more lube. Wipe off the residue with a dry microfibre cloth.
The Koch-Chemie Reactive Rust Remover "Rrr" iron fallout remover 500 ml handles step 2. It's pH-neutral, dissolves iron particles on paint and wheels and shows the reaction by turning purple. So you see straight away where the iron fallout is. After the dwell time, rinse thoroughly, and only then does the clay come in. You'll find more products under Rust remover.
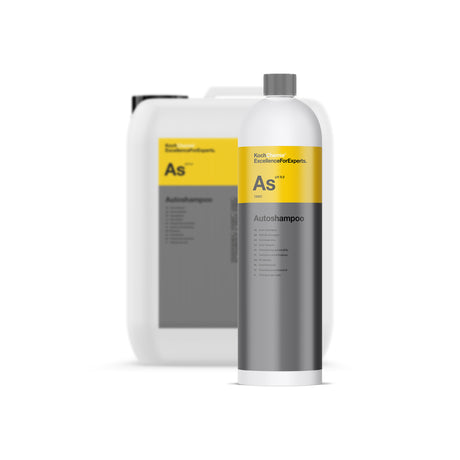
The Koch-Chemie Hydro Foam Sealant "S0.03" Wet-Coat Sealant Concentrate 1000 ml / 1 litre finishes the routine. Dilute the concentrate between 1:50 and 1:150 as Koch-Chemie specifies, apply it to the wet car with a foam sprayer or pump sprayer, let it work briefly, rinse off and dry. The step only takes a few minutes, so it fits nicely at the end of a long clay day.
If there's really stubborn contamination on older paint, there's the Koch-Chemie Cleaning Clay "Rkr" Abrasive "Red" Clay Bar 200 g. It's considerably stronger, but it isn't suitable for fresh paint and leaves marks that you then have to polish out. For normal autumn paint the blue clay is enough. Which clay suits which job is explained in the article Clay Bar for Your Car: Mild or Abrasive, and Why the Lube Decides on Swirls. All versions are under Cleaning clay.

Detailing1-Insight: A customer wanted to polish car-wash swirls out of his paint with a dual-action polisher and then apply a long-term sealant. He emailed us to ask whether the clay was really necessary first. Our answer: yes, if the touch test comes out rough. Otherwise everything still sitting on the paint gets caught under the polishing pad and dragged across the panel. Then you're polishing scratches out and putting new ones in at the same time. Ten minutes of touch testing saves you hours on the machine here.
Common clay bar mistakes that leave scratches and holograms
Claying isn't a difficult step, but a few mistakes turn smooth paint into paint with fine marks.
The most common mistake is too little lube. The clay has to float. If the section dries out, it rubs directly on the paint, and the particles it has picked up drag fine lines. That's why you work in small sections and spray again before the surface dries.
The second mistake is pressure. The clay works through its material, not through your strength. Press hard and you push the particles into the paint instead of shearing them off. Lay the clay flat and let it glide, nothing more. Circular movements don't belong here either, because they leave marks in every direction.
The third mistake happens in a second: the clay falls on the ground. Then it's full of sand and grit you can't get back out. That clay goes in the bin, even if it's a shame with an almost new piece. Carrying on would scratch the paint. That's exactly why you only work with part of the bar and leave the rest in the tin.
The fourth mistake has to do with autumn. In cool temperatures the clay goes hard and is difficult to shape. It works best between about 15 and 22 °C. If it's colder, put it in warm water for a few minutes first. In direct sun, on the other hand, you don't clay, because lube and paint dry too quickly there.
The fifth mistake is the wrong lube. Washing-up liquid and glass cleaner break down the clay; it goes sticky and smears. The iron fallout remover isn't a lube either, for the same reason. Use a lube spray made for clay.

And finally: some people suddenly see holograms and fine scratches after claying and think the clay caused them. Often they were already there. The contamination on the paint was just hiding them, and the bare paint now shows them honestly. That said, the red abrasive clay can leave holograms itself if used incorrectly. It always needs to be followed by a polish.
How often to clay: once before winter, once in spring
Claying isn't part of your normal wash; it's a step for once or twice a year.
The most sensible time is now in autumn, before the winter sealant. The second fits in spring, when the road salt season is over and the paint gets prepped again. In between, it's enough to wash regularly and check the paint with the touch test now and then. Clay more often and you strip the sealant every time and work the paint more than you need to.
To keep the paint smooth between two sessions, a sealant helps more than any other step. Metal particles, sap and tar bond less well to a protected surface, and a lot of it comes off in the wash. Regular washing in winter does the rest, because salt and industrial fallout don't get to sit for weeks. An iron fallout remover in between, say in February, keeps the iron particles in check without you needing the clay again.
For the next few days that means: wait out the changeable weekend and wash on the first dry day from Monday. Touch test on bonnet, roof and boot, then iron fallout remover, rinse, clay in straight lines and finally the rinse-off sealant. With breaks, that's an afternoon. After that the paint feels like glass, and the salt has nothing left to grip.
No time for the whole post? Get it summarized: